The routers used on the Panel Pro incorporate an adapter so that end mills less than ¼” can be used.
The adapter and collet system are very accurate if used correctly. If the collet is installed incorrectly, it can result in poor cutting performance, heavy burrs, and broken end mills.
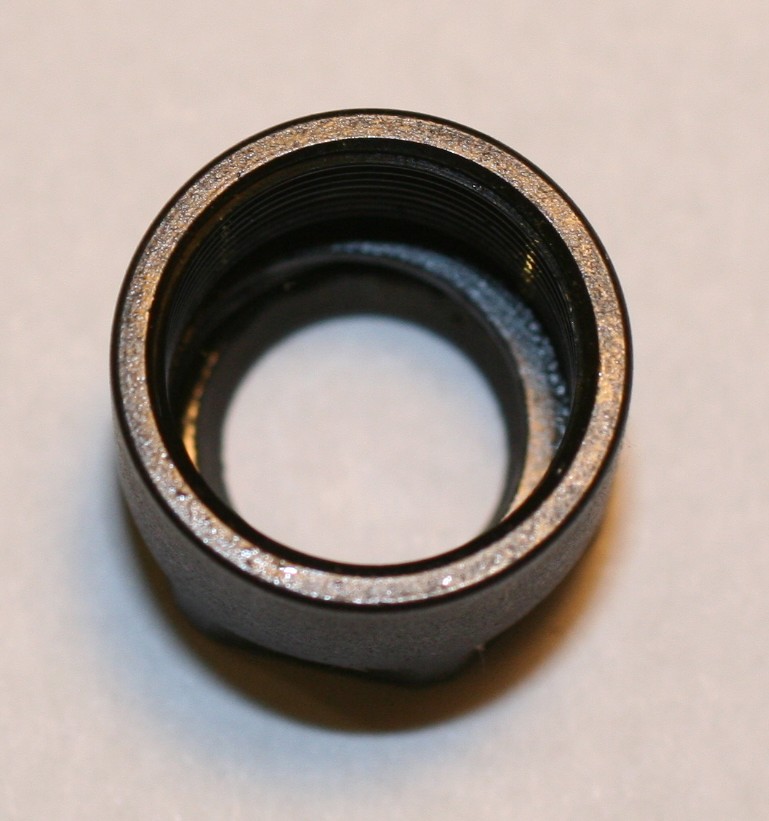
The collet nut is shown to the right. Note the tapered area on the end of the nut. This is the taper that matches the front taper of the collet. Just aft of that taper is an off center hole that forms a lip. This is an extractor ring. On some collet nuts this can be more of a quarter moon shape. This lip is intended to catch the groove on the collet. The taper centers and aligns the collet, and the lip on the nut catches the groove in the collet and extracts the collet from the collet bore.
Collet installation procedure
With no end mill installed in the collet, press the collet into the collet nut. Rock the back of the collet from side to side to work the nose of the collet past the extractor ring. The end mill cannot be in the collet at this time because it will keep the collet from compressing enough to get by the extractor ring.
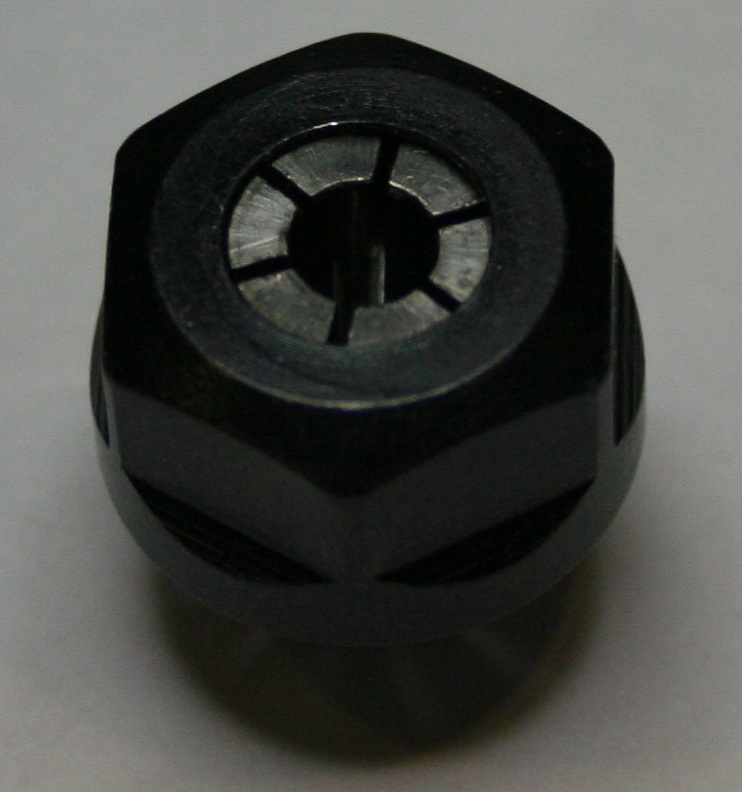
A properly installed collet will be nearly flush with the nose of the collet nut, and will not fall out of the nut when tipped upside down.
A collet that is not snapped into the extractor ring will not be flush with the end of the nut and the end mill will be cocked off to the side, and there will be minimal thread engagement between the nut and adapter.
To remove a collet, remove the nut from the adapter. Remove the end mill. With a small screw driver push on the individual collet segments until you feel the part of the extractor ring that is not gripping the collet. The collet will be cocked off to one side at this point. Continue pushing until the collet clears the nut.
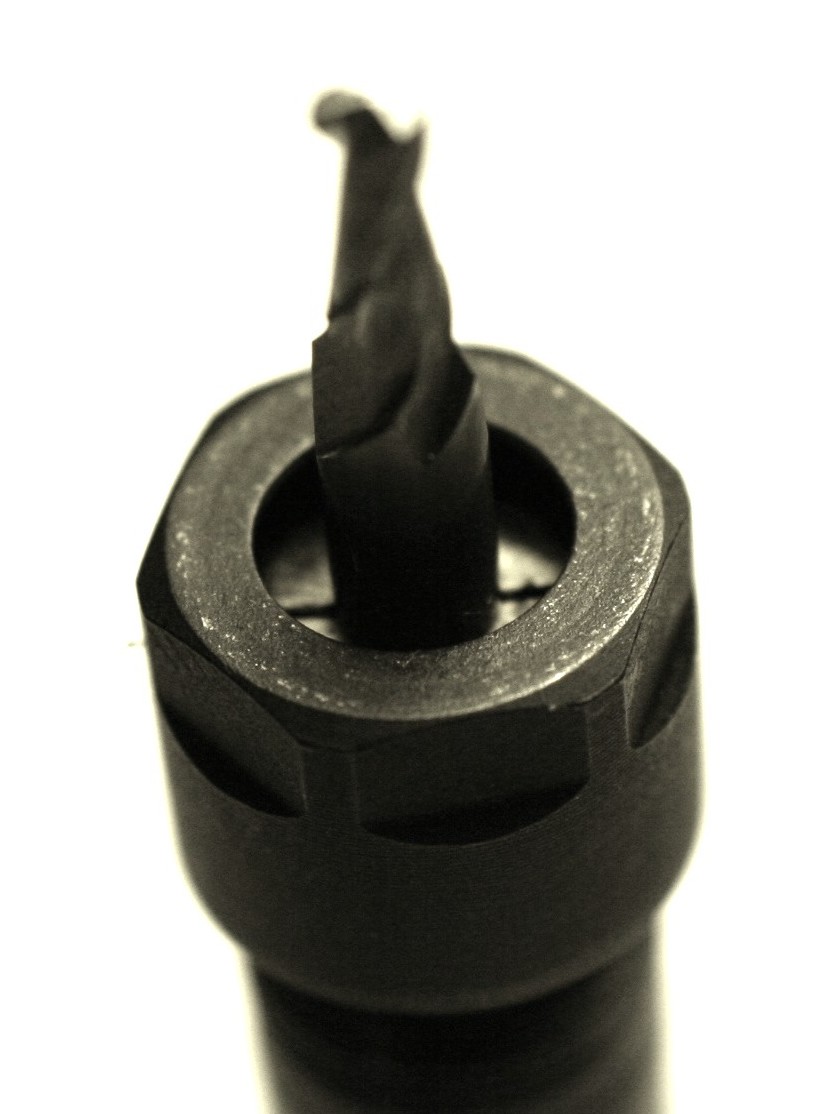
How deep should I install the end mill into the collet? The short answer is as deep as possible. It is imperative that the end mill is gripped by the entire length of the collet. Any less and it may not be running straight, and will not have the grip it needs to keep it in place. It is tempting to have it sticking out a long ways to clear clamps or other obstructions. The picture on the right shows an end mill that was not clamped deep enough into the collet. It slid out some more and started cutting on the UN-sharpened area of the end mill.
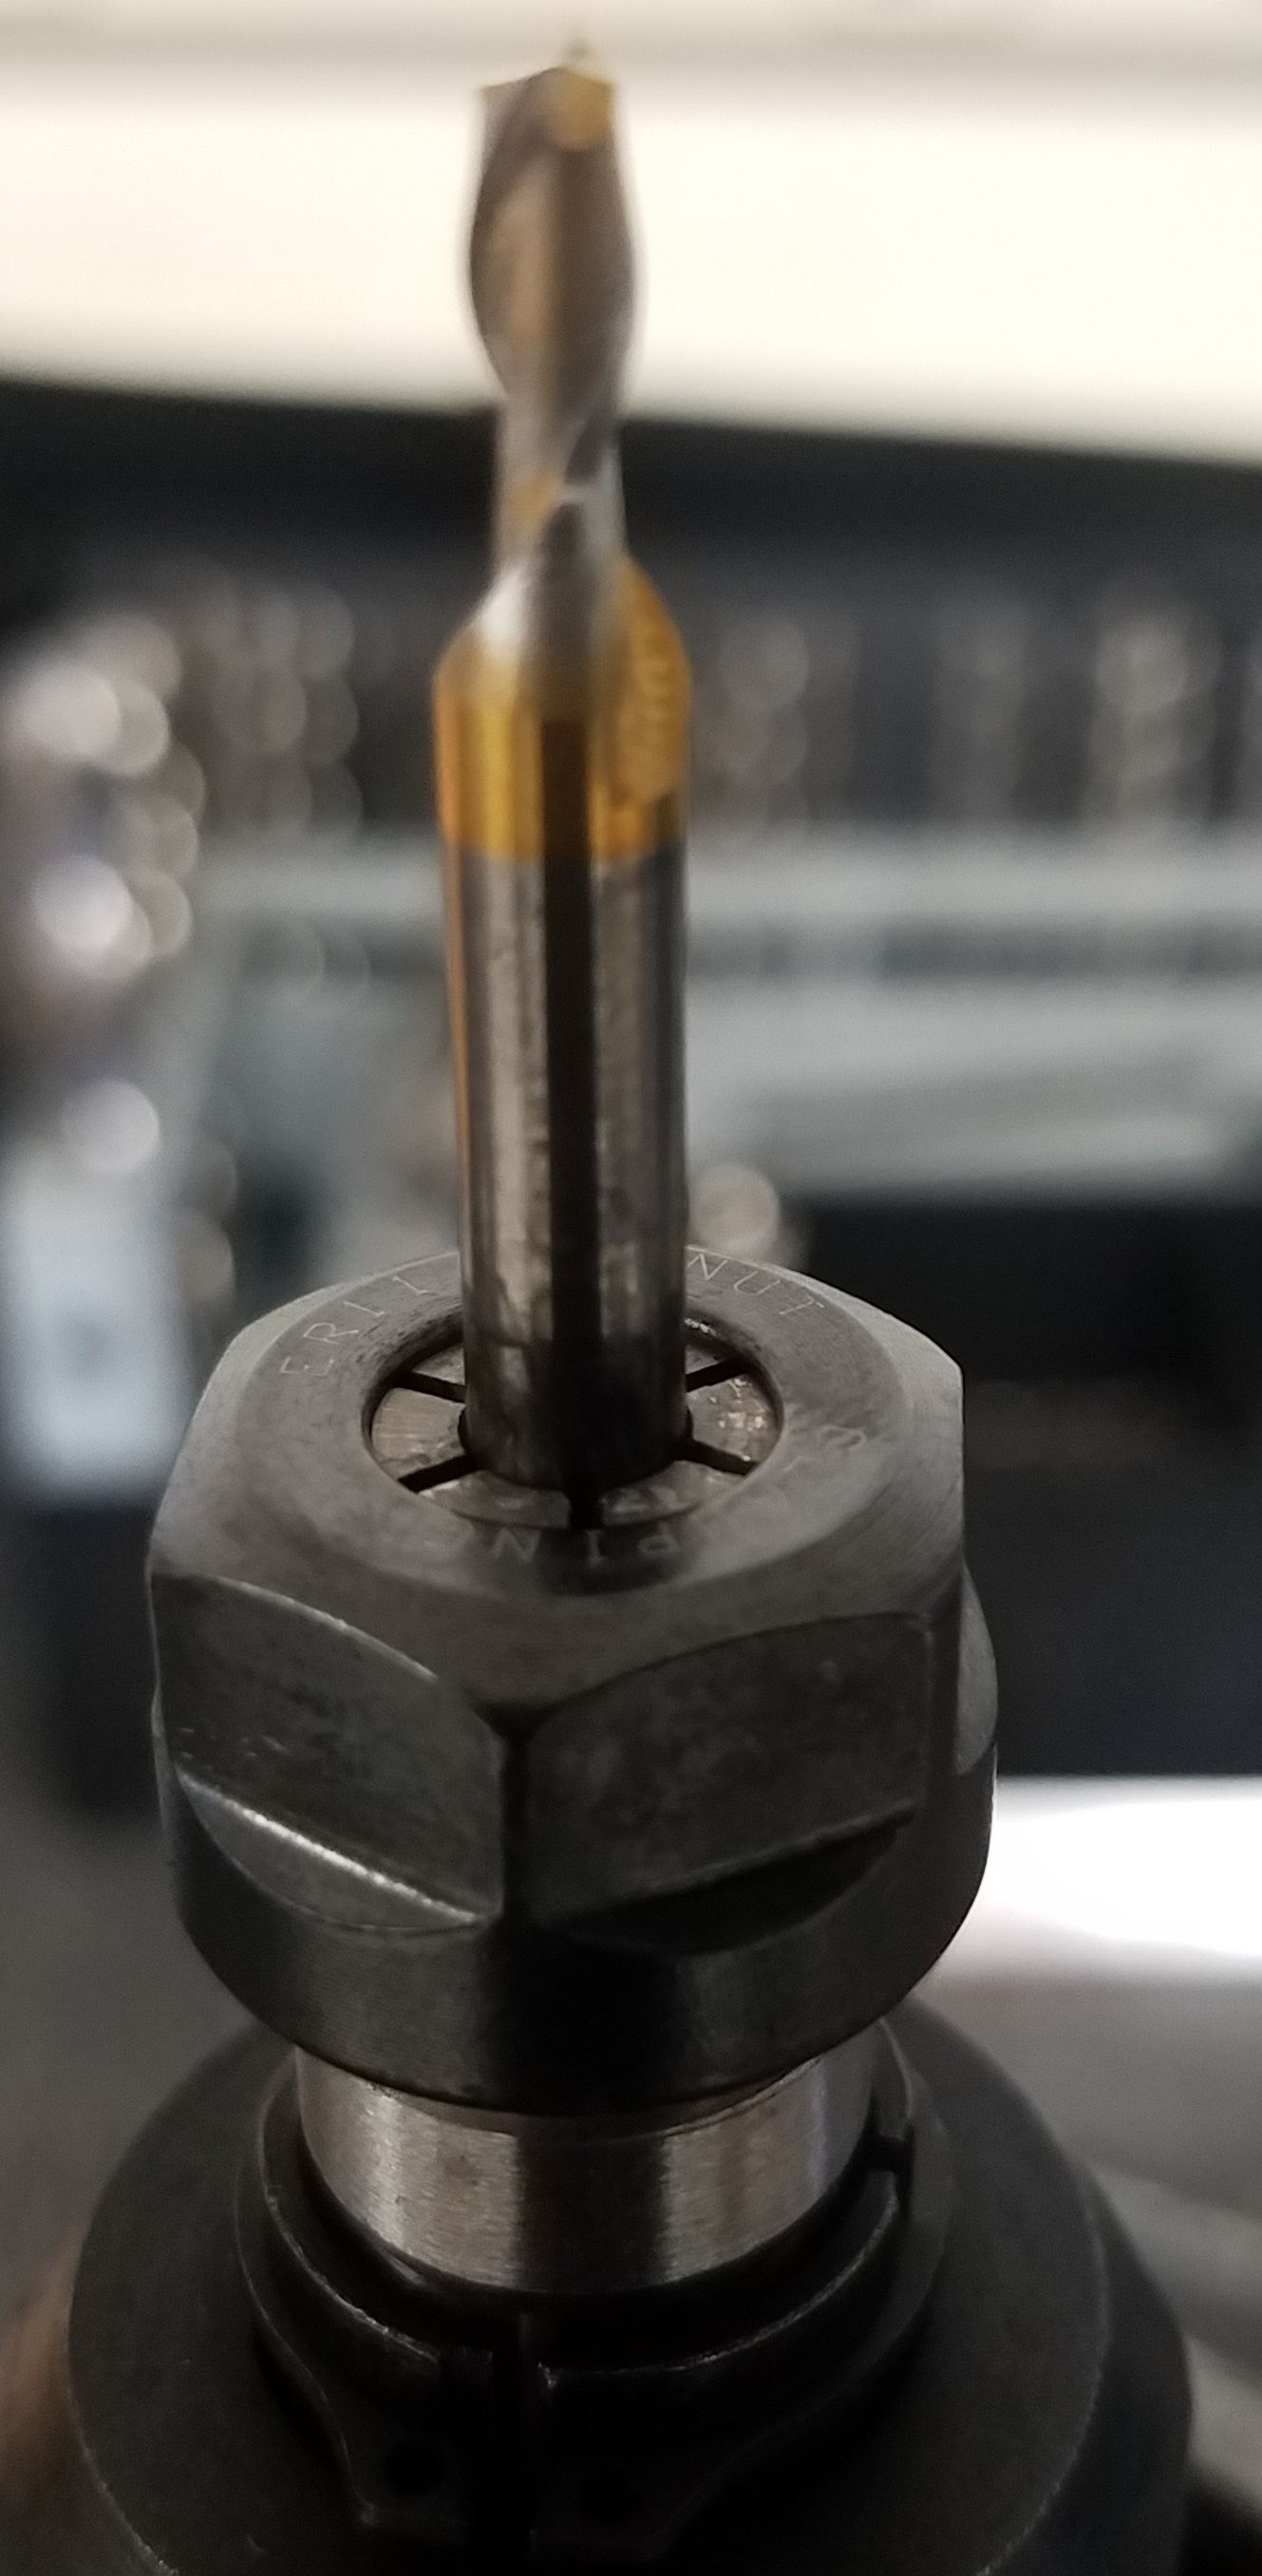
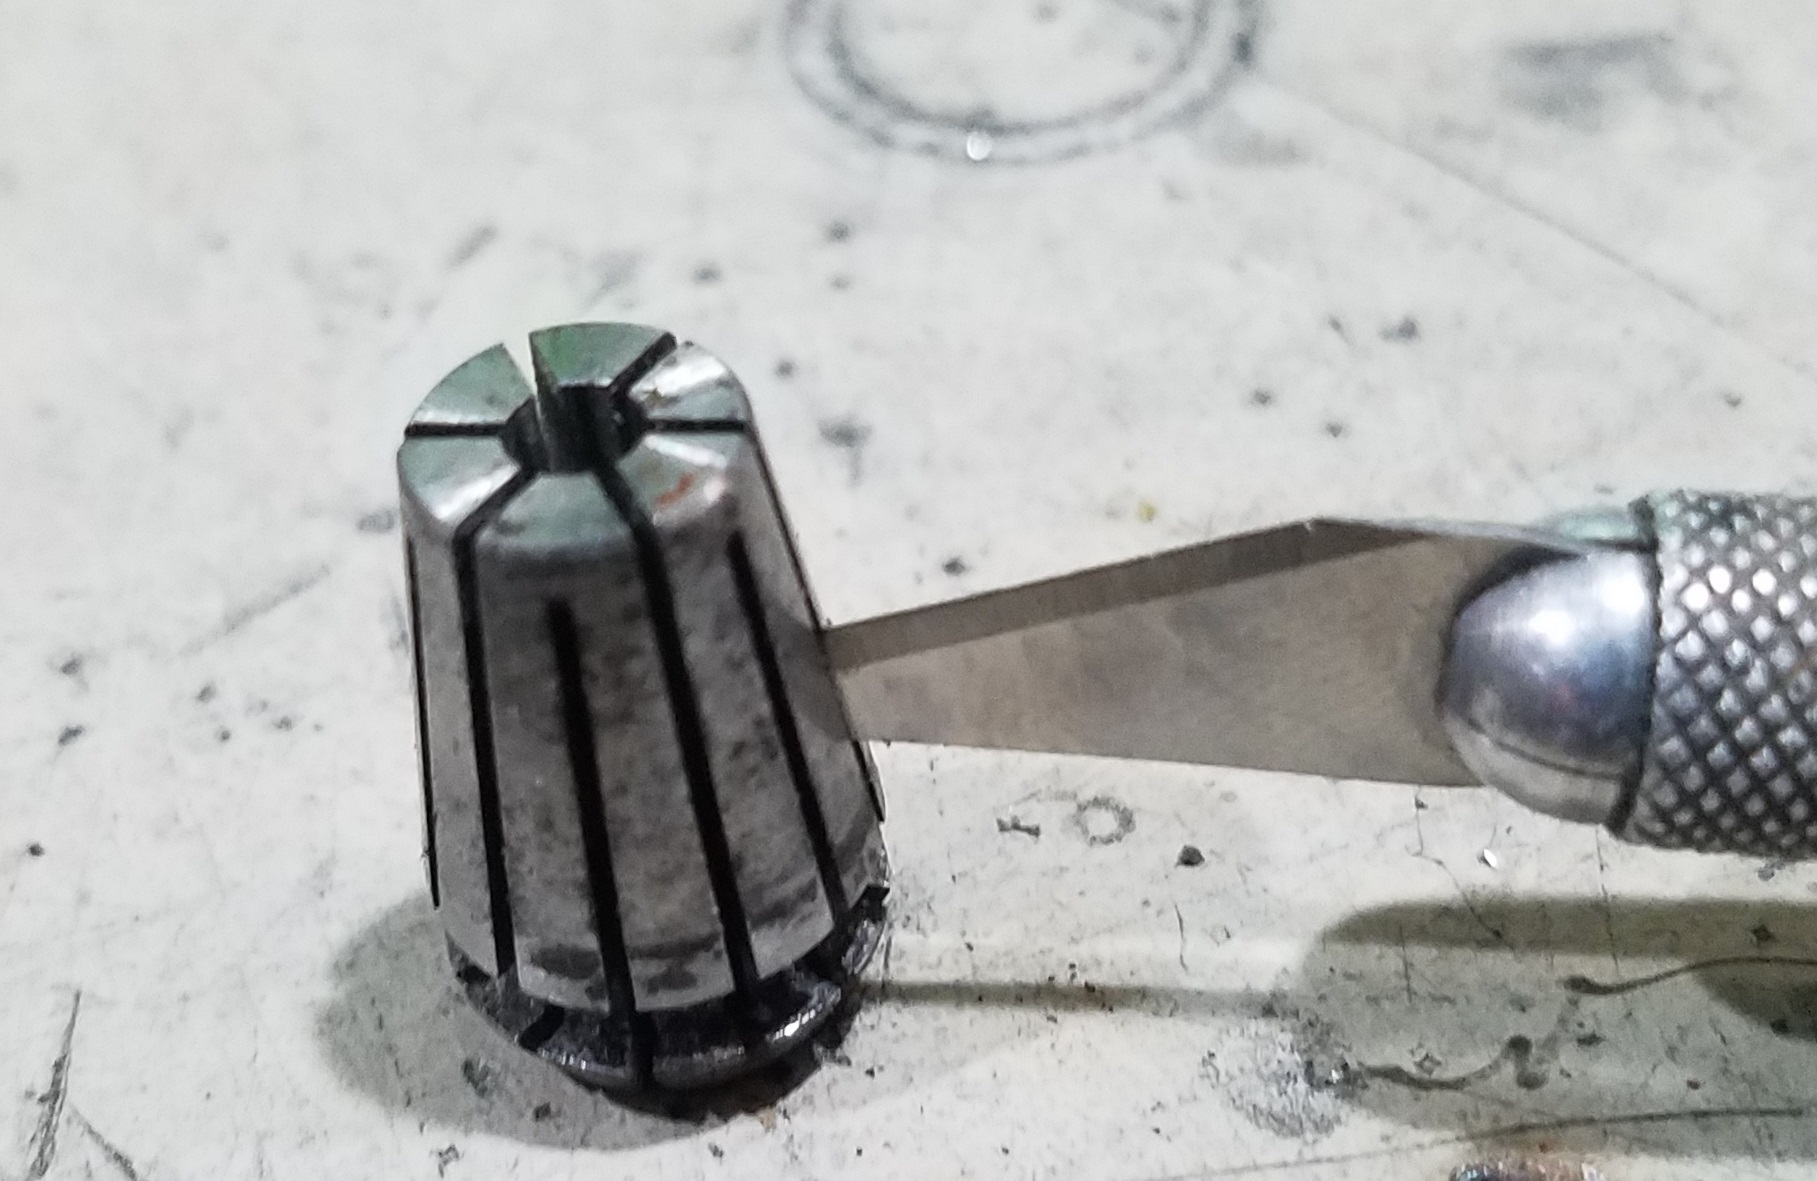
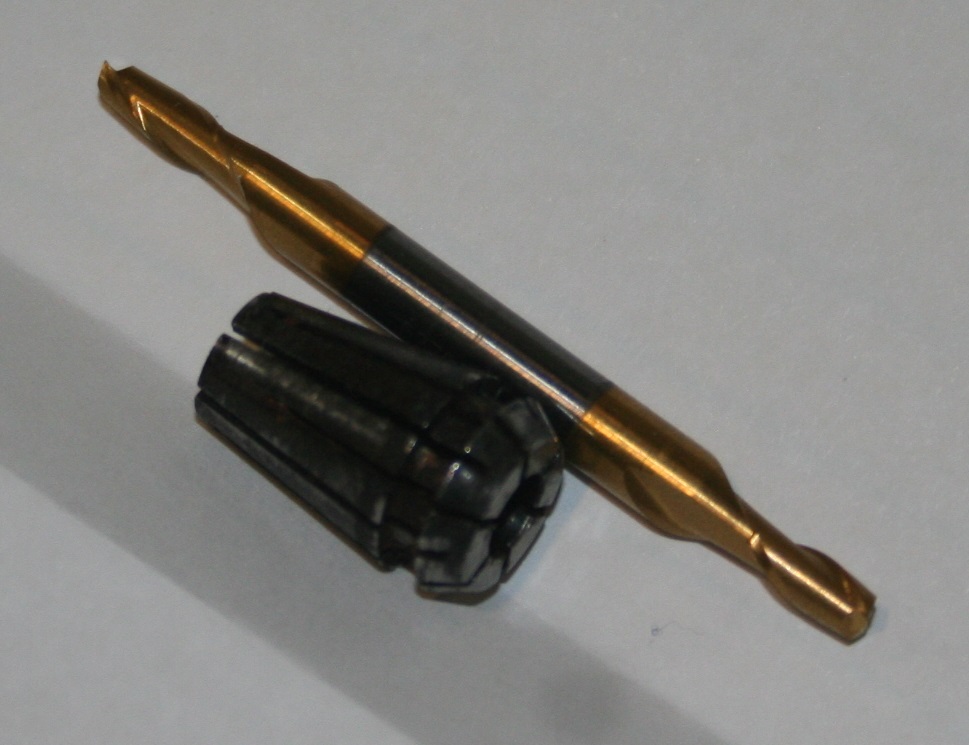
Looking at the picture to the left, you will see the collet is approximately .7” long. The end mill needs to be inserted way in there to get all of the grip from the collet.
Oiling the collet. The collets and adapters are not corrosion resistant. Ideally, they should be removed, cleaned and oiled after use. I realize that is probably not going to happen, but at an absolute minimum, squirt some WD40 or LPS1 or other water displacing, corrosion inhibiting oil in the openings at the end of the collet after use. If you do remove the collet and oil after use, then the oil should be wiped off the mating surfaces before inserting the collet into the collet bore and the end mill into the adapter. Oil trapped on the mating surface will do what oil is supposed to do and reduce friction, in this case reducing grip.
Remove a stuck collet. 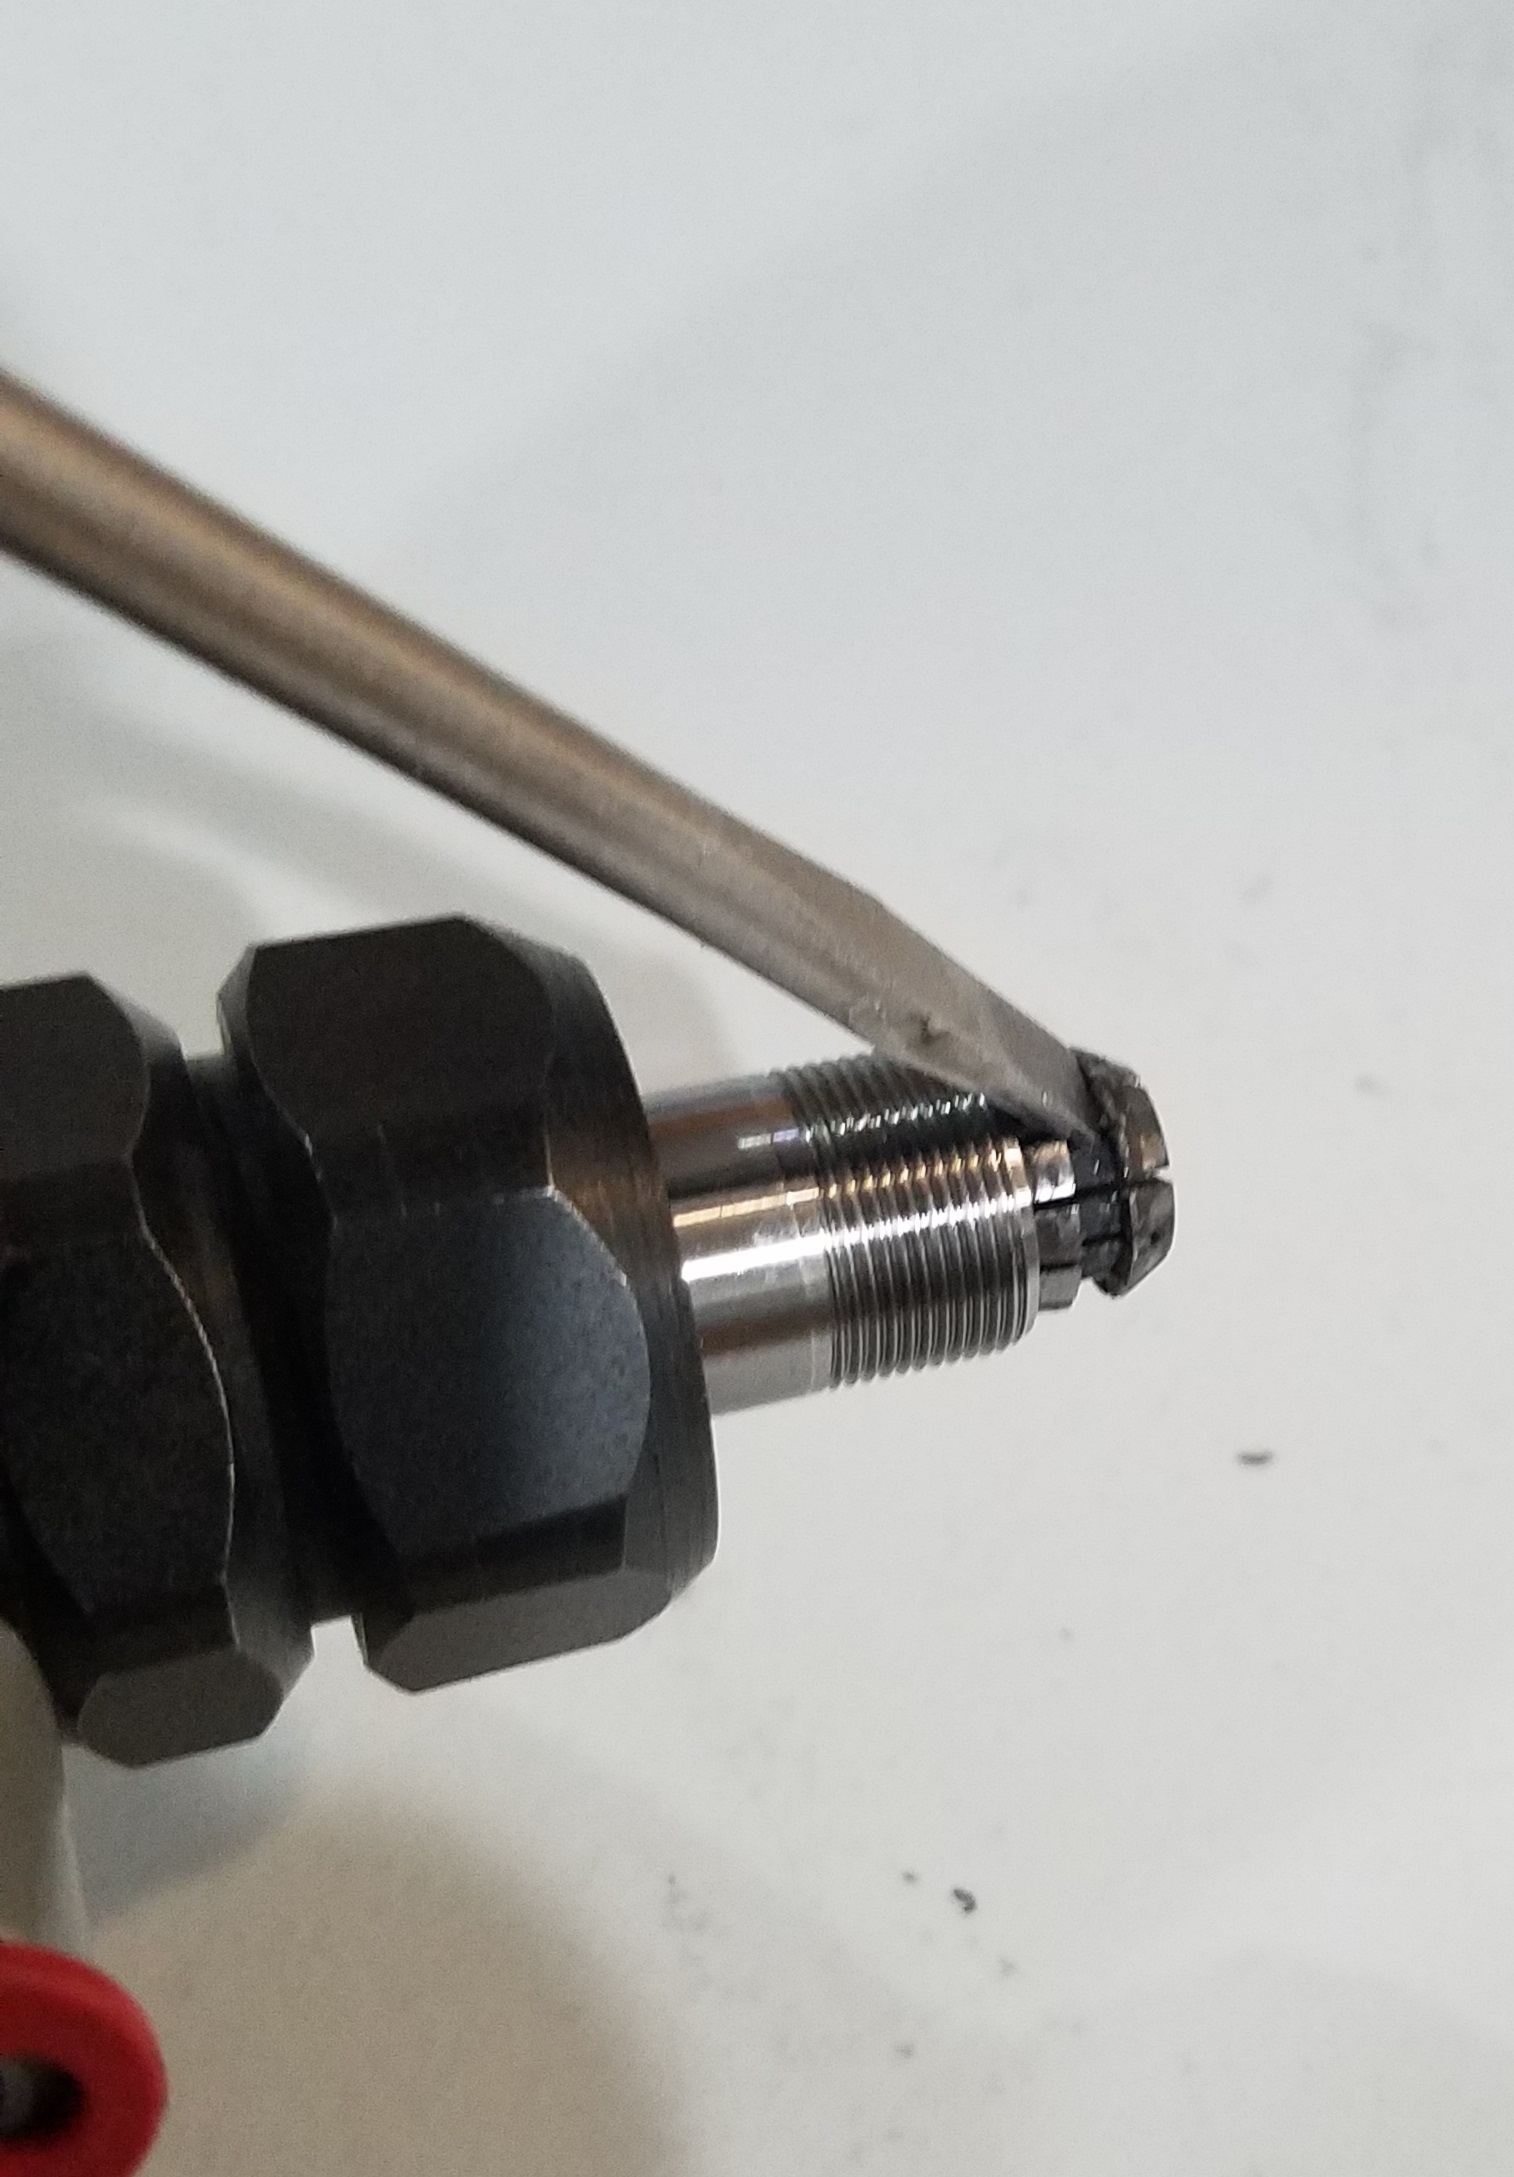 If a collet has been installed with an end mill in place, the extractor ring may have been damaged or excess corrosion allowed to build, the collet may get stuck in the collet bore. With the collet nut removed, using a flat tip screw driver as a punch, place the screwdriver tip in the extraction slot of the collet and tap the back of the screwdriver with a light hammer. The collet in this case is probably not re-usable. At a minimum it needs to be cleaned to knock out the crud stuck between the sections.